The Importance of Bleed
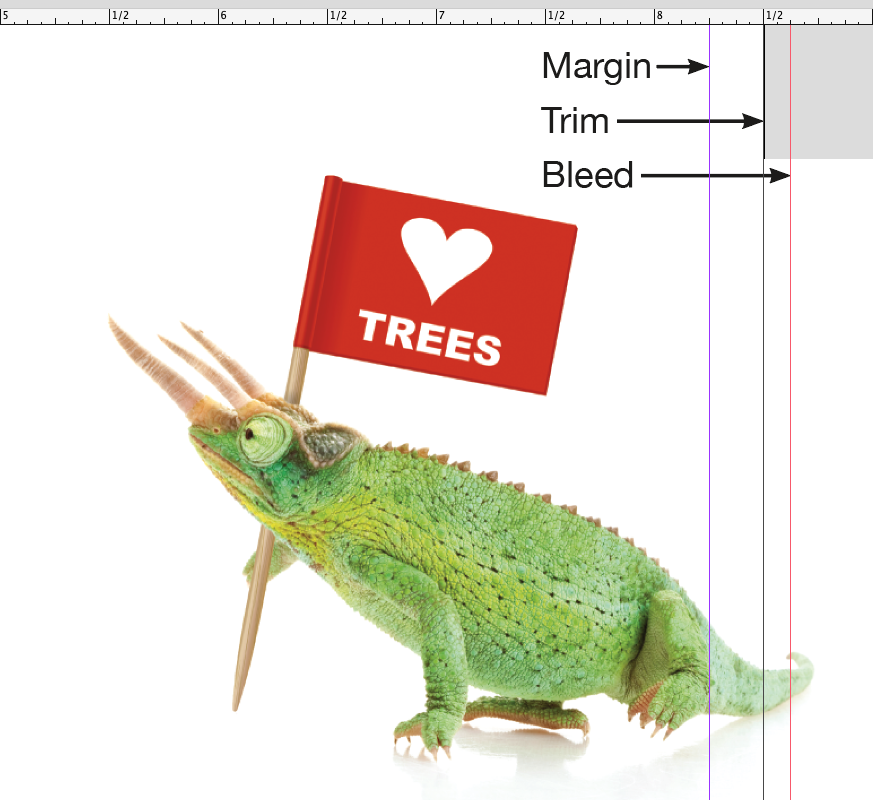
When printing imagery that goes to the edge of the paper. It’s best to actually extend the image over the edge of the document at least 1/8”, to compensate for any small imperfections in the cutting process. Our machinery is state-of-the-art and very accurate, but cutting happens with a stack of hundreds of papers at one time and could be off slightly. You wouldn’t want to wind up with a thin, white edge, so we add this thing called bleed. The sample below shows an image with the bleed pulled out properly, at least 1/8” (this one is actually over the 1/8”, but that’s fine).

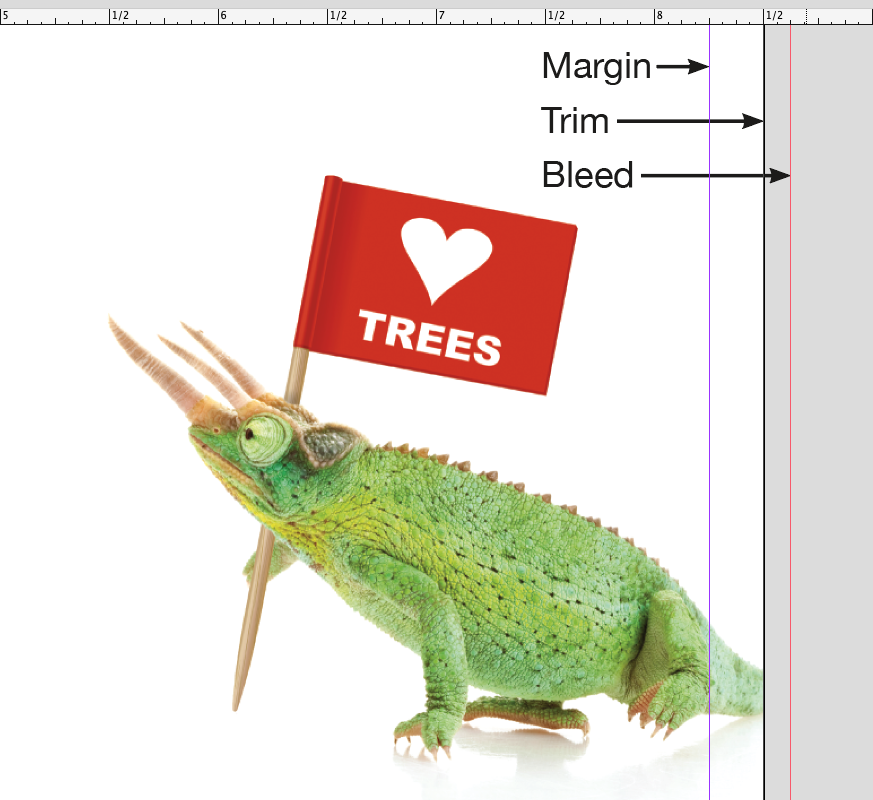
This next example shows the image ending right on the trim. When we see this scenario, we try to pull out the bleed if there is more image in the image box.

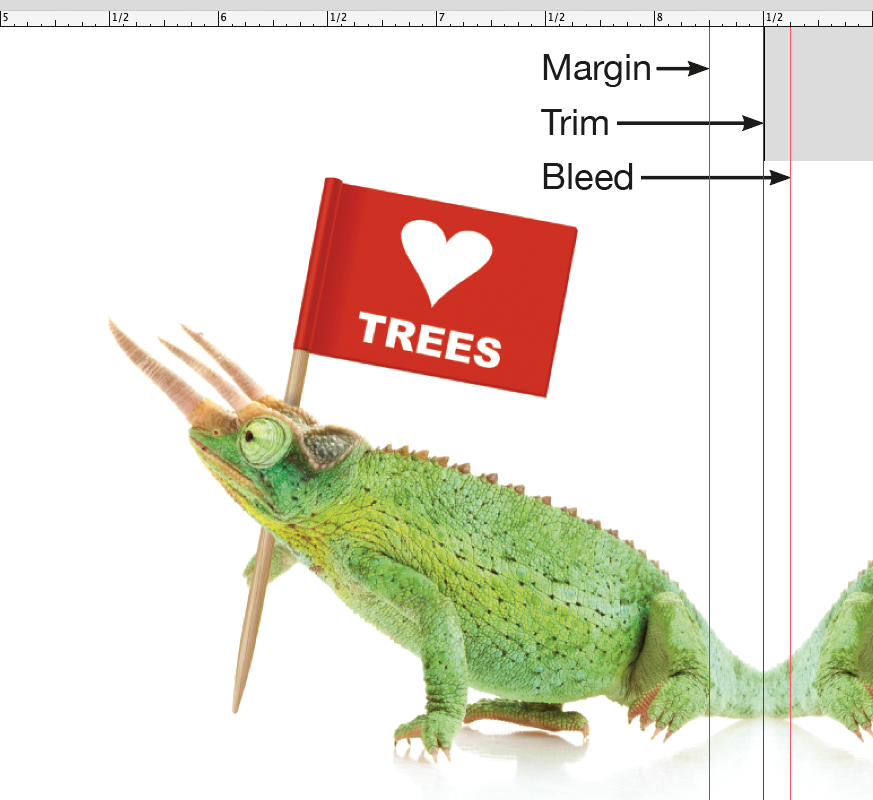
If there’s not, we do a little thing that we call “faux bleed” by flipping the image horizontally, but as you can see, the angle of the tail changes directions and it’s possible that there would be a little edge of the tail going the wrong direction on the paper. It’s not optimal, but it’s better than no bleed.

This becomes increasingly more complex if we have pdfs supplied with no bleed, or multiple page books with no bleed.
Moral of the story… it is best to always consider the bleed when designing, and especially when exporting PDFs.